โปรแกรม Capture Screen

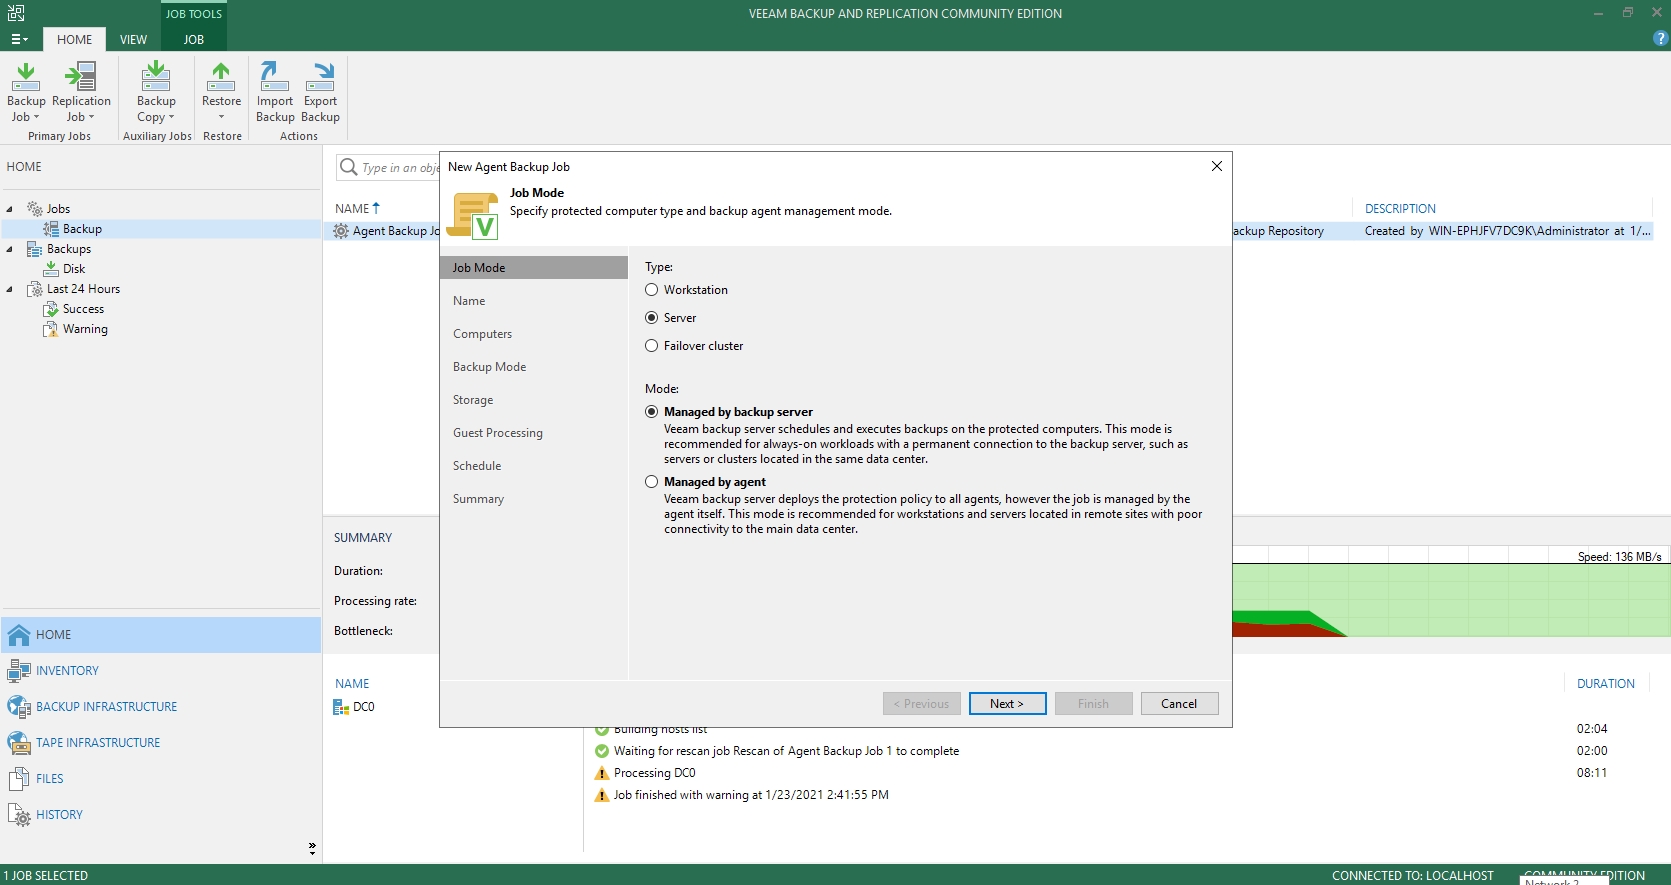
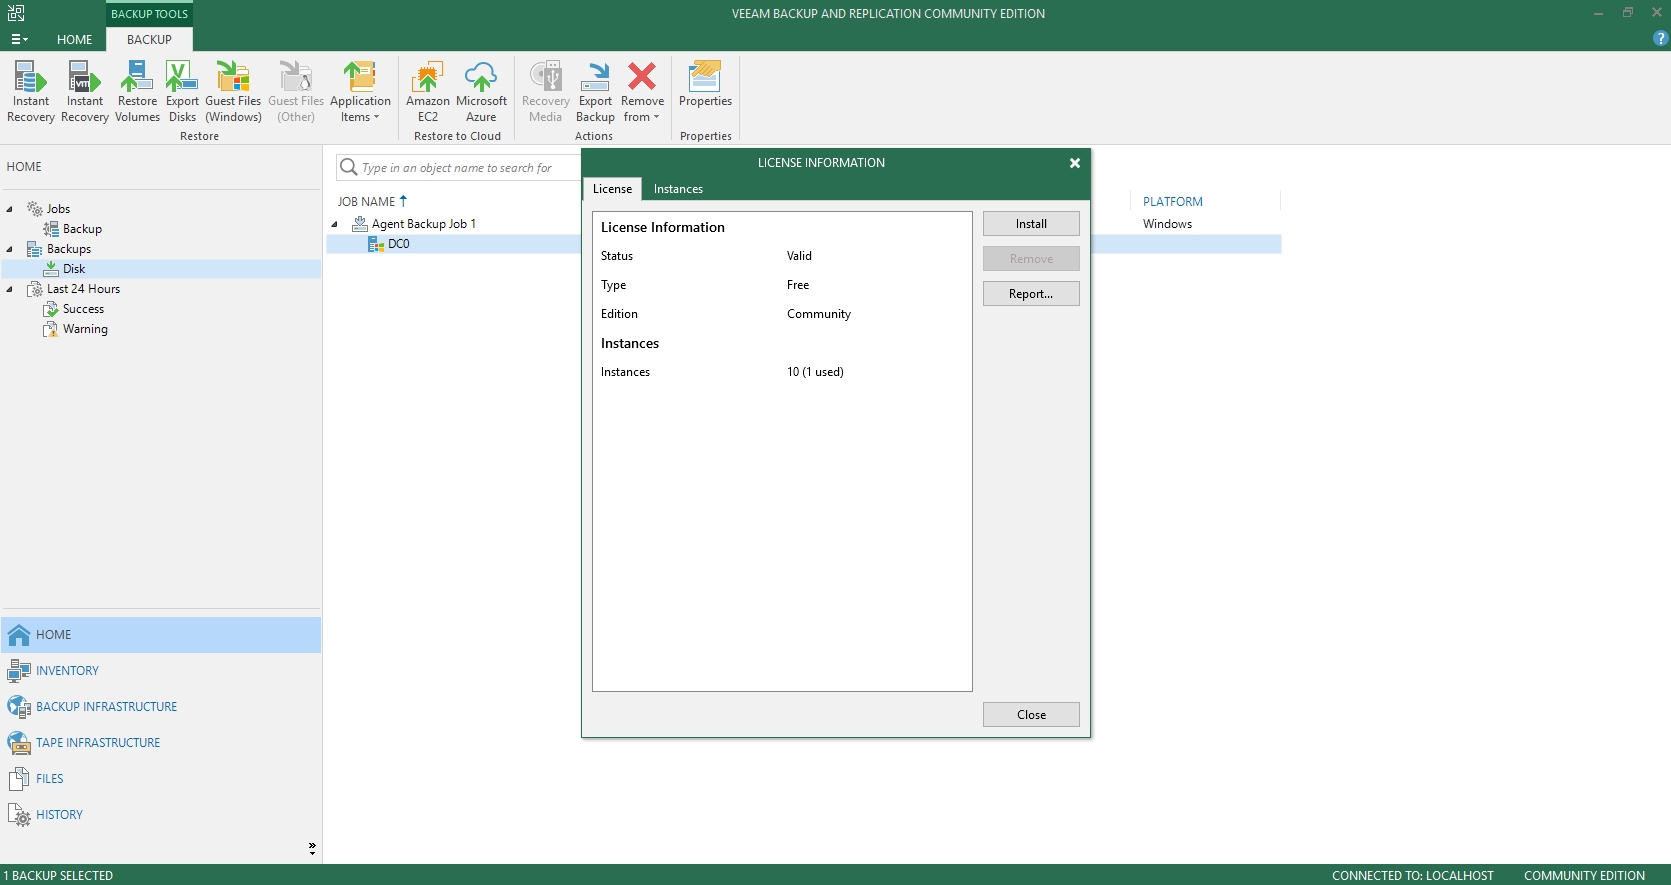
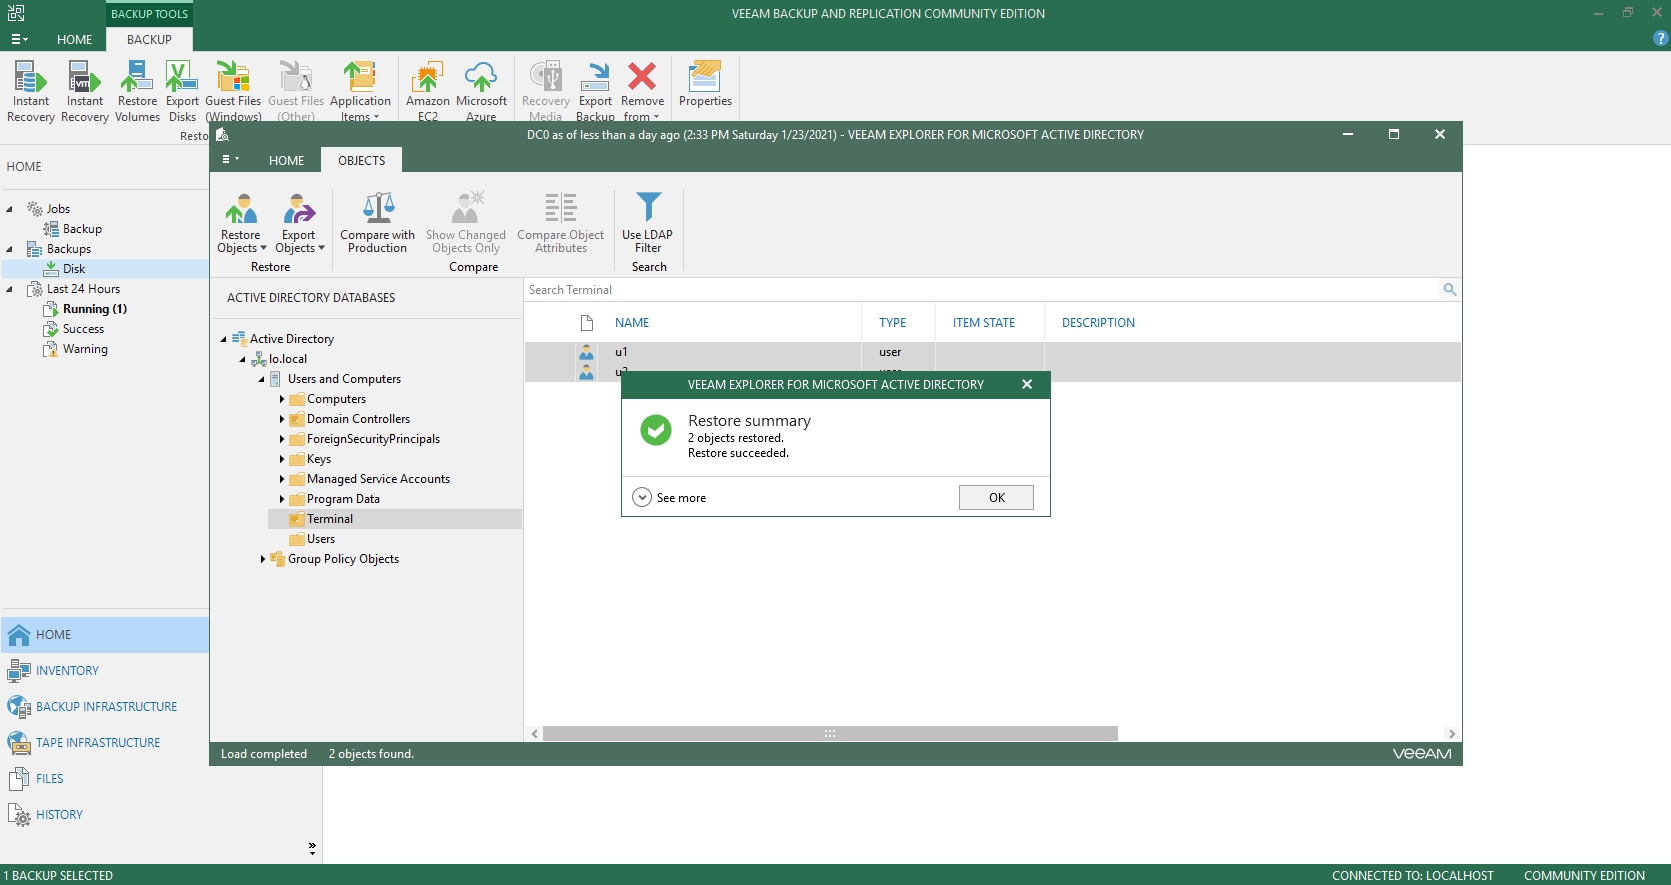
หลังจาก Implement เสร็จก็ต้องทำ Report ซึ่งจำเป็นต้อง Capture จำนวนมาก ซึ่งส่วนใหญ่ก็ Capture ที่เดิมแค่เปลี่ยนหน้าไปเรื่อยๆ สิ่งที่ต้องการคือแค่กด Shortcut แล้วให้ Save เลยไม่ต้องแจ้งเตือน

โปรแกรมที่ผมใช้คือ Greenshot ซึ่งไม่ Update นานแล้วแต่ยังใช้งานได้ดี สำหรับ Tool บน Windows ยังขาดการให้ Capture ที่เดิมกับ Save อัตโนมัติ

Download Greenshot: Downloads (getgreenshot.org)

วิธีตั้งค่าบน Greenshot

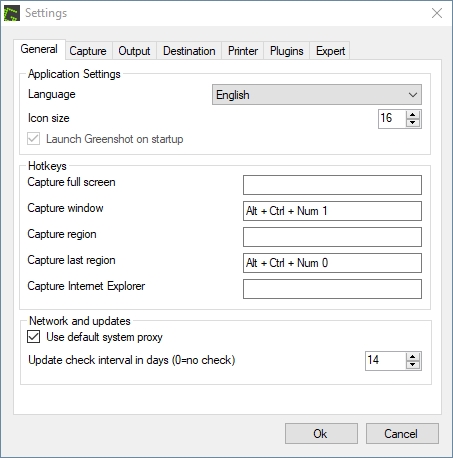
  • Preference > General > Capture Last Region > ตั้ง shortcut ที่ต้องการ
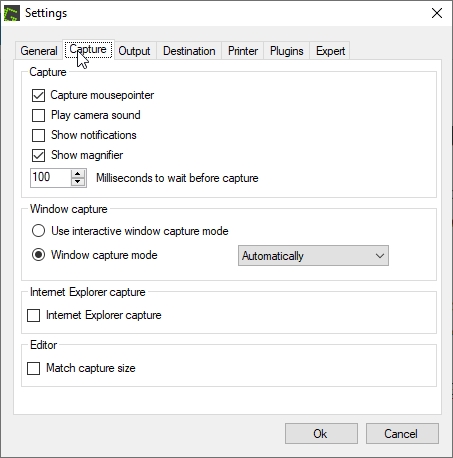
  • Preference > Capture > เอา Show Notifications ออก
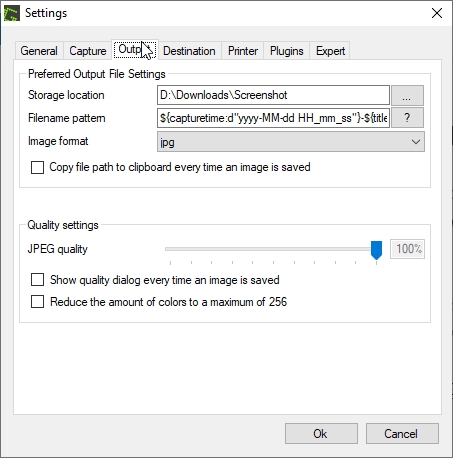
  • Preference > Output > ตั้งค่า folder ที่จะ save, รูปแบบชื่อไฟล์, ประเภทไฟล์
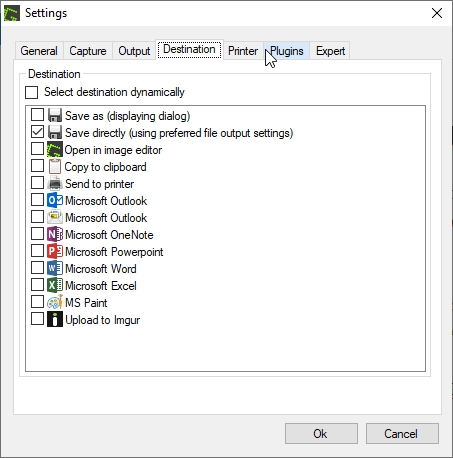
  • Preference > Destination > Save Directly

ตั้งค่าให้แต่ละโปรแกรมจำ Layout ภาษาที่ใช้อยู่

เวลานั่งทำงานส่วนใหญ่ก็ใช้ Keyboard ภาษาอังกฤษ แต่พอตอบ line ก็ต้องสลับใช้ภาษาไทย ซึ่งต้องกดสลับภาษาไปมา บางทีก็ลืม วิธีให้โปรแกรมจำภาษาที่ใช้อยู่แยกกันให้ไปตั้งค่าที่

Setting>Devices>Typing>Advanced Keyboard Settings ติ๊กถูกที่ Let me use a different input method for each app windows

Veeam Backup & Replication Community Edition ฟรีสำหรับ 10 Server

สำหรับองค์การที่มี Phycical และ Virtual Server รวมกันไม่เกิน 10 เครื่อง นำมาใช้งานได้ฟรี โดยความสามารถเพียงพอสำหรับการใช้งานทั่วไป แต่ถ้าใช้ 11 เครื่อง ก็ต้องซื้อทั้ง 11 เครื่องไม่ใช่ซื้อเพิ่มแค่ 1 ครับ

สิ่งที่ต้องมีคือ Server สำหรับติดตั้ง VEEAM 1 เครื่อง

  • Backup Application-aware, Physical, VM, Windows, Linux
  • Restore Full Server, File, Application Object

ผมว่าองค์กรเล็กๆ ซื้อ PC มาซักเครื่องติดตั้ง VEEAM ก็ได้ Backup Software ดีๆ มาใช้แล้วดีกว่าข้อมูลหายแล้วไม่มี Backup ครับ

ติดตั้ง Microsoft Edge บน Windows Server 2019

บน Windows Server 2016 และ Windows Server 2019 ไม่ได้ติดตั้ง Microsoft Edge มาด้วย เมื่อเปิด Internet Explorer ขึ้นมาก็มีข้อความให้ Update ไปใช้ Microsoft Edge แต่เมื่อกด Link ไปเพื่อติดตั้งกลับติดตั้งไม่ได้ มีข้อความเตือนว่า You’ll need a new app to open this microsoft-edge

วิธีแก้คือต้องติดตั้ง Microsoft Edge for business โดยไป Download มาจาก https://www.microsoft.com/en-us/edge/business/download

  • Select channel/version : เลือก Stable ใหม่ที่สุด
  • Select build : เลือกเวอร์ชั่นล่าสุด
  • Select platform : เลือก Platform ที่เราใช้ 32 bit หรือ 64 bit หรือ arm64

จากนั้นก็ Download มาติดตั้งเหมือน Software ทั่วไปครับ

Windows Client

  • Windows 7 (Support until July 15, 2021)
  • Windows 8.1
  • Windows 10 SAC RS3 and later
  • Windows 10 Enterprise 2015 LTSC
  • Windows 10 Enterprise 2016 LTSC
  • Windows 10 Enterprise 2019 LTSC
  • Windows 10 Enterprise multi-session

Windows Server

  • Windows Server 2008 R2 (Support until July 15, 2021)
  • Windows Server 2012
  • Windows Server 2012 R2
  • Windows Server 2016 (LTSC)
  • Windows Server 2019 (LTSC)
  • Windows Server (SAC)

สร้าง SelfSign Certificate บน Microsoft Exchange

ผมมีงาน Migrate Exchange 2010 เป็น Exchange 2016 แล้วไปเจอว่า Exchange 2010 ใช้ SelfSign Cetificate ซึ่งโดยปกติเราจะใช้ CA ภายในหรือซื้อ SSL Certificate มาใช้งานมากกว่า

นอกจากนั้น Selfsign Certificate ที่ใช้ก็มีแค่ DNS เดียว ก็จะขึ้น Error Certificate ให้ user ต้องกดทุกวัน ผมเลยทำ Selfsign Certificate ให้ใหม่โดนใส่ทุก DNS ลงไป พร้อมกับเพิ่มเข้า Trust Root Certificate ผ่าน GPO ให้ด้วย

วิธีนี้ช่วยให้ทุกเครื่องที่ Join Domain ไม่ขึ้น Error Certificate แต่สำหรับโทรศัพท์ Tablet หรือการใช้งานจากภายนอกก็ยัง Error เหมือนเดิม ตอนนี้แจ้งให้ลูกค้าซื้อ SSL Wildcard ไปแล้ว

คำสั่งสร้าง SelfSign Certificate แบบมีหลาย DNS

New-ExchangeCertificate -FriendlyName "Contoso Exchange Certificate" -SubjectName CN=Exchange01 -DomainName mail.contoso.com,autodiscover.contoso.com,Exchange01.contoso.com,Exchange02.contoso.com -Services SMTP,IIS -PrivateKeyExportable $true

หลังจากสร้างเสร็จก็ใส่ Role ใน Exchange แลัว Export มาใช้กับ GPO ให้เครื่อง Client Trust ได้เลยครับ